共计 3395 个字符,预计需要花费 9 分钟才能阅读完成。
当你的WordPress中的文章达到上万篇,随着流量的增加,Wordpress的服务器压力也随之不断加大,Wordpress发布文章和后台相关的操作都会变得缓慢,这时如果单从硬件上投入来提高Wordpress性能显然不划算。
利用Redis将WordPress页面直接缓存在服务器的内存中,这样在避免了PHP重复执行操作的同时,内存的极速响应能够最大限度地提升Wordpress页面的访问速度,部落实际测试发现页面执行时间可以降低到0.00X秒级别,比没有使用Redis缓存提升几倍甚至十几倍以上。
安装Redis
安装方法有编译和yum安装两种,由于上一篇升级PHP7的文章《WordPress优化之路-PHP升级》安装的yum源刚好含有redis的最新版本,且安装的PHP包含了redis的拓展,查看方法可以通过phpinfo页面查看,也可通过下面的命令
php -m | grep redis![]()
yum install redis -y
systemctl start redis
systemctl enable redis
[root@i-0ipyzyp0 download]# redis-cli
127.0.0.1:6379> info
# Server
redis_version:3.2.10
redis_git_sha1:00000000
redis_git_dirty:0
redis_build_id:c8b45a0ec7dc67c6
redis_mode:standalone
os:Linux 3.10.0-514.10.2.el7.x86_64 x86_64
arch_bits:64
multiplexing_api:epoll
gcc_version:4.8.5
process_id:17142
run_id:b2e1f08049107011ddbb35884e7a3cc5c32f2bef
tcp_port:6379
uptime_in_seconds:5324
uptime_in_days:0
hz:10
lru_clock:13577326
executable:/usr/bin/redis-server
config_file:/etc/redis.conf
# Clients
connected_clients:1
client_longest_output_list:0
client_biggest_input_buf:0
blocked_clients:0
# Memory
used_memory:1634328
used_memory_human:1.56M
used_memory_rss:3563520
used_memory_rss_human:3.40M
used_memory_peak:1634328
used_memory_peak_human:1.56M
total_system_memory:3974828032
total_system_memory_human:3.70G
used_memory_lua:37888
used_memory_lua_human:37.00K
maxmemory:0
maxmemory_human:0B
maxmemory_policy:noeviction
mem_fragmentation_ratio:2.18
mem_allocator:jemalloc-3.6.0
# Persistence
loading:0
rdb_changes_since_last_save:0
rdb_bgsave_in_progress:0
rdb_last_save_time:1506749260
rdb_last_bgsave_status:ok
rdb_last_bgsave_time_sec:0
rdb_current_bgsave_time_sec:-1
aof_enabled:0
aof_rewrite_in_progress:0
aof_rewrite_scheduled:0
aof_last_rewrite_time_sec:-1
aof_current_rewrite_time_sec:-1
aof_last_bgrewrite_status:ok
aof_last_write_status:ok
# Stats
total_connections_received:124
total_commands_processed:206
instantaneous_ops_per_sec:0
total_net_input_bytes:1278199
total_net_output_bytes:1823231
instantaneous_input_kbps:0.01
instantaneous_output_kbps:6.06
rejected_connections:0
sync_full:0
sync_partial_ok:0
sync_partial_err:0
expired_keys:0
evicted_keys:0
keyspace_hits:117
keyspace_misses:33
pubsub_channels:0
pubsub_patterns:0
latest_fork_usec:159
migrate_cached_sockets:0
# Replication
role:master
connected_slaves:0
master_repl_offset:0
repl_backlog_active:0
repl_backlog_size:1048576
repl_backlog_first_byte_offset:0
repl_backlog_histlen:0
# CPU
used_cpu_sys:3.15
used_cpu_user:1.53
used_cpu_sys_children:0.01
used_cpu_user_children:0.01
# Cluster
cluster_enabled:0
# Keyspace
db0:keys=1,expires=0,avg_ttl=0使wordpress支持redis
wget http://download.cloudcared.cn/software/redis/predis.php下载完成后,移动至wordpress根目录
前端缓存的PHP脚本
wget http://download.cloudcared.cn/software/redis/index-with-redis.php备份WordPress原有的index.php
mv index.php index.php.bak
mv index-with-redis.php index.php
根据自己需求修改index-with-redis.php,修改如下:
$cf = 0; // set to 1 if you are using cloudflare
$debug = 1; // set to 1 if you wish to see execution time and cache actions
$display_powered_by_redis = 0; // set to 1 if you want to display a powered by redis message with execution time, see below
如果你正在使用cloudflare,请设置cf = 1; ,
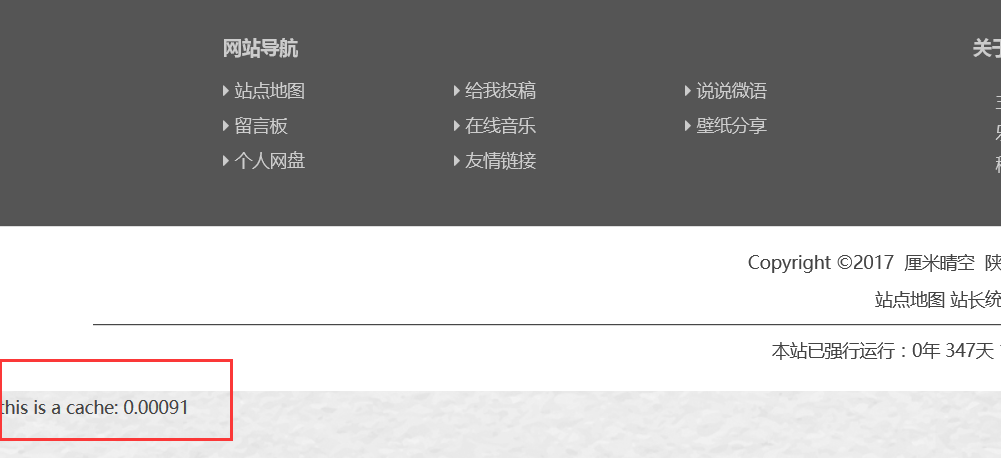
如果你想在页面上看到脚本执行时间和缓存加载时间,请设置$debug = 1; 浏览器最下方会显示this is cache:
display_powered_by_redis = 1表示显示powered_by信息。如下图右下角图标:
[v_notice]登录后台网站url后面加上?c=y即可刷新整个网站
可以在网站页面后面加上?r=y即可手工刷新
提交评论会自动刷新页面
刷新(f5)页面也可以刷新页面
刷新网页查看缓存效果,查看源代码
chrome浏览器页面最下角会显示类似:this is a cache: 0.04534
F5刷新页面缓存时间会变化[/v_notice]
[v_error]注意,Wordpress Redis缓存PHP版本在5.3以上
Wordpress Redis缓存加速效果无疑是明显的,特别页面多访问大的网站博客,在使用Wordpress Redis缓存加速时请禁止其它的所有缓存插件,以免造成不必要的冲突[/v_error]
优化效果


